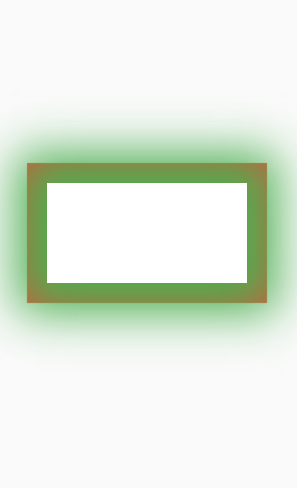
# Explore Container Widget in Flutter
# Explore Container Widget in Flutter
A tutorial to help you understand the Container Widget in Flutter.

## Try out Container widget and it’s properties directly from [DartPad](https://dartpad.dev/3ac31b204e94d54403faa9a719e5b5e6)
# Introduction to Container Widget
It is a Widget that combines painting, positioning and sizing of the widget.
Syntax to create a Container-
```
Container()
```
This will create a container and it try to size itself as small as possible.
# How to define a child of Conatiner
```
Container(child: FlutterLogo(),
color:Colors.red
)
```
The output is-

Now you can see that we declare only a child inside our Container but we do not assign any height and width to it .So Container by default try to Size itself according to Child size.That is why our Container is soo small.
# How to define Height and Width for Container
```
Container(child: FlutterLogo(),
height: 100, width: 100
)
```
The output is-

Now our Flutter Logo size increased.
# How to define a Color to the Container
Simply use the color property
```
Container(child: FlutterLogo(),
height: 100, width: 100,
color: Colors.red
)
```
The output is-

# How to define Margin to our Container
Margin is basically the empty space that surround the decoration and child of container.
```
Container(
child: FlutterLogo(),
height: 400,
width: 200,
color: Colors.red,
margin: EdgeInsets.all(60)
)
```
The output is-

The green space in the margin that surround the Container.
For more details on EdgeInsets refer my SizedBox Widget article.
# How to define Padding to Container
To understand it easily let’s take the above example
```
Container(
child: FlutterLogo(),
height: 400,
width: 200,
color: Colors.red,
margin: EdgeInsets.all(60),
padding: EdgeInsets.all(50)
)
```
The output is-

Now in the image the Logo shrinks because we define padding to Container.
# How to align Our child Inside Container
If we want to align our child we use the alignment property which can have values-
bottonCenter,bottomLeft,bottomRight,center,centerLeft,centerRight,topLeft,topRight,topCenter
Let’s see an example how to define them-
```
Container(
child: FlutterLogo(size: 50),
height: 300,
width: 300,
color: Colors.red,
alignment: Alignment.topCenter,
margin: EdgeInsets.all(40)
)
```
The output is-

Now use any value instead of topCenter and try to find what happens with the Widget.
# How to decorate our Container
We can use the decoration property which can have any value either
1. BoxDecoration
2. FlutterLogoDecoration
3. ShapeDecoration
# Let First dive deep in BoxDecoration
It is used to paint a box.Box may have a border, body, shadow
```
Container(
child: Text("Hello"),
height: 200,
width: 200,
decoration: BoxDecoration(color: Colors.redAccent)
)
```
The Output is-

You can see that here we define color for our container using BoxDecoration class.
# How to apply Border to our Container
We can apply border same for all side or different for each side.Let’s see each one.
## For all side same border
```
Container(
child: Center(child:Text("hello")),
height: 200,
width: 200,
decoration: BoxDecoration(
color: Colors.red,
border: Border.all(width: 33, color: Colors.green),
))
```
The output is-

As you can see we have a border of same width for all side.
## How to define defferent border for each side
```
Container(
child: Center(child:Text("Hello")),
height: 200,
width: 200,
decoration: BoxDecoration(
color: Colors.redAccent,
border: Border(
top: BorderSide(width: 5, color: Colors.green),
left: BorderSide(width: 10, color: Colors.yellow),
right: BorderSide(width: 15, color: Colors.blue),
bottom: BorderSide(width: 25, color: Colors.grey),
)))
```
The Output is-

Now here all four side of container have different color and width of border.
NOTE : You can also define border for any combination of side.
# How to define Border Radius
Border radius is used to curve the edges (style) of border.
## Rounded rectangle containers with border
```
Container(
child:Center(child: Text("hello")),
height: 200,
width: 200,
decoration: BoxDecoration(
color: Colors.red,
border: Border.all(width: 5,color: Colors.yellow),
borderRadius: BorderRadius.circular(30)
))
```
The Output is-

You can see the rounded yellow border in the image.
What if we Increases the value of radius.
## Circular Container
```
Container(
child:Center(child: Text("hello")),
height: 200,
width: 200,
decoration: BoxDecoration(
color: Colors.red,
border: Border.all(width: 5,color: Colors.yellow),
borderRadius: BorderRadius.circular(200)
))
```
The Output is-

Now you can see that we have a circular container .That looks nice.
## Conatiner with Horizontal radius(Left and Right)
```
Container(
height: 200.0,
width: 200.0,
alignment: Alignment.center,
decoration: BoxDecoration(
borderRadius: BorderRadius.horizontal(
left: Radius.circular(20.0),
right: Radius.circular(80.0)
),
color: Colors.green,
),
child: Text('Hello'),
)
```
The Output is-

Now observe that the Left side edge are curved same and right side edge curve is same.
## Conatiner with Vertical radius(Top and Bottom)
```
Container(
height: 200.0,
width: 200.0,
alignment: Alignment.center,
decoration: BoxDecoration(
borderRadius: BorderRadius.vertical(
top: Radius.circular(20.0),
bottom: Radius.circular(80.0)
),
color: Colors.green,
),
child: Text('Hello'),
)
```
The output is-

Now the border is same from top and same for bottom.
# Container with Image and Rounded Border
```
Container(
height: 200.0,
width: 200.0,
decoration: BoxDecoration(
borderRadius: BorderRadius.circular(20.0),
color: Colors.white,
image: DecorationImage(fit: BoxFit.cover,
image: NetworkImage(‘[https://picsum.photos/200/300’](https://picsum.photos/200/300')))
),
)
```
The output is-

## Container with List of Box Shadow
```
Container(
height: 100.0,
width: 200.0,
decoration: BoxDecoration(
color: Colors.white,
boxShadow: [
BoxShadow(color: Colors.red, blurRadius: 0.0, spreadRadius:20 ),
BoxShadow(color: Colors.green, blurRadius: 40.0, spreadRadius:30)
]
),
)
```
The Output is-

 ## Try out Container widget and it’s properties directly from [DartPad](https://dartpad.dev/3ac31b204e94d54403faa9a719e5b5e6)
# Introduction to Container Widget
It is a Widget that combines painting, positioning and sizing of the widget.
Syntax to create a Container-
```
Container()
```
This will create a container and it try to size itself as small as possible.
# How to define a child of Conatiner
```
Container(child: FlutterLogo(),
color:Colors.red
)
```
The output is-

## Try out Container widget and it’s properties directly from [DartPad](https://dartpad.dev/3ac31b204e94d54403faa9a719e5b5e6)
# Introduction to Container Widget
It is a Widget that combines painting, positioning and sizing of the widget.
Syntax to create a Container-
```
Container()
```
This will create a container and it try to size itself as small as possible.
# How to define a child of Conatiner
```
Container(child: FlutterLogo(),
color:Colors.red
)
```
The output is-

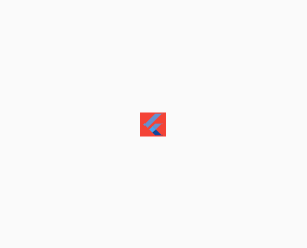 Now you can see that we declare only a child inside our Container but we do not assign any height and width to it .So Container by default try to Size itself according to Child size.That is why our Container is soo small.
# How to define Height and Width for Container
```
Container(child: FlutterLogo(),
height: 100, width: 100
)
```
The output is-

Now you can see that we declare only a child inside our Container but we do not assign any height and width to it .So Container by default try to Size itself according to Child size.That is why our Container is soo small.
# How to define Height and Width for Container
```
Container(child: FlutterLogo(),
height: 100, width: 100
)
```
The output is-

 Now our Flutter Logo size increased.
# How to define a Color to the Container
Simply use the color property
```
Container(child: FlutterLogo(),
height: 100, width: 100,
color: Colors.red
)
```
The output is-

Now our Flutter Logo size increased.
# How to define a Color to the Container
Simply use the color property
```
Container(child: FlutterLogo(),
height: 100, width: 100,
color: Colors.red
)
```
The output is-

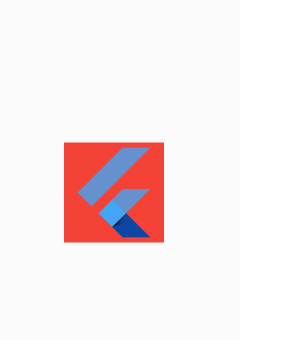 # How to define Margin to our Container
Margin is basically the empty space that surround the decoration and child of container.
```
Container(
child: FlutterLogo(),
height: 400,
width: 200,
color: Colors.red,
margin: EdgeInsets.all(60)
)
```
The output is-

# How to define Margin to our Container
Margin is basically the empty space that surround the decoration and child of container.
```
Container(
child: FlutterLogo(),
height: 400,
width: 200,
color: Colors.red,
margin: EdgeInsets.all(60)
)
```
The output is-

 The green space in the margin that surround the Container.
For more details on EdgeInsets refer my SizedBox Widget article.
# How to define Padding to Container
To understand it easily let’s take the above example
```
Container(
child: FlutterLogo(),
height: 400,
width: 200,
color: Colors.red,
margin: EdgeInsets.all(60),
padding: EdgeInsets.all(50)
)
```
The output is-

The green space in the margin that surround the Container.
For more details on EdgeInsets refer my SizedBox Widget article.
# How to define Padding to Container
To understand it easily let’s take the above example
```
Container(
child: FlutterLogo(),
height: 400,
width: 200,
color: Colors.red,
margin: EdgeInsets.all(60),
padding: EdgeInsets.all(50)
)
```
The output is-

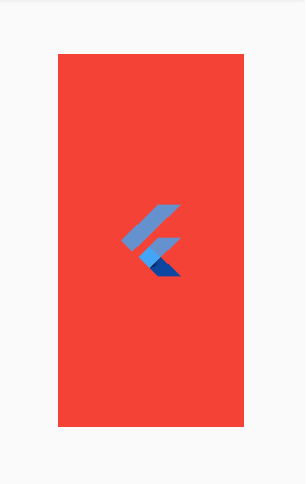 Now in the image the Logo shrinks because we define padding to Container.
# How to align Our child Inside Container
If we want to align our child we use the alignment property which can have values-
bottonCenter,bottomLeft,bottomRight,center,centerLeft,centerRight,topLeft,topRight,topCenter
Let’s see an example how to define them-
```
Container(
child: FlutterLogo(size: 50),
height: 300,
width: 300,
color: Colors.red,
alignment: Alignment.topCenter,
margin: EdgeInsets.all(40)
)
```
The output is-

Now in the image the Logo shrinks because we define padding to Container.
# How to align Our child Inside Container
If we want to align our child we use the alignment property which can have values-
bottonCenter,bottomLeft,bottomRight,center,centerLeft,centerRight,topLeft,topRight,topCenter
Let’s see an example how to define them-
```
Container(
child: FlutterLogo(size: 50),
height: 300,
width: 300,
color: Colors.red,
alignment: Alignment.topCenter,
margin: EdgeInsets.all(40)
)
```
The output is-

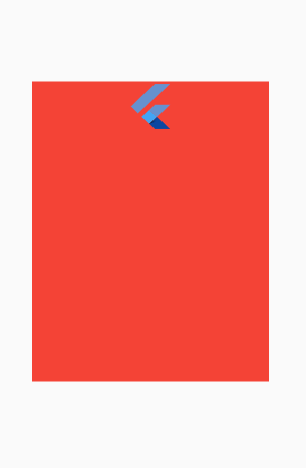 Now use any value instead of topCenter and try to find what happens with the Widget.
# How to decorate our Container
We can use the decoration property which can have any value either
1. BoxDecoration
2. FlutterLogoDecoration
3. ShapeDecoration
# Let First dive deep in BoxDecoration
It is used to paint a box.Box may have a border, body, shadow
```
Container(
child: Text("Hello"),
height: 200,
width: 200,
decoration: BoxDecoration(color: Colors.redAccent)
)
```
The Output is-

Now use any value instead of topCenter and try to find what happens with the Widget.
# How to decorate our Container
We can use the decoration property which can have any value either
1. BoxDecoration
2. FlutterLogoDecoration
3. ShapeDecoration
# Let First dive deep in BoxDecoration
It is used to paint a box.Box may have a border, body, shadow
```
Container(
child: Text("Hello"),
height: 200,
width: 200,
decoration: BoxDecoration(color: Colors.redAccent)
)
```
The Output is-

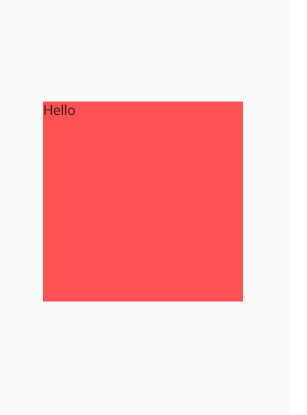 You can see that here we define color for our container using BoxDecoration class.
# How to apply Border to our Container
We can apply border same for all side or different for each side.Let’s see each one.
## For all side same border
```
Container(
child: Center(child:Text("hello")),
height: 200,
width: 200,
decoration: BoxDecoration(
color: Colors.red,
border: Border.all(width: 33, color: Colors.green),
))
```
The output is-

You can see that here we define color for our container using BoxDecoration class.
# How to apply Border to our Container
We can apply border same for all side or different for each side.Let’s see each one.
## For all side same border
```
Container(
child: Center(child:Text("hello")),
height: 200,
width: 200,
decoration: BoxDecoration(
color: Colors.red,
border: Border.all(width: 33, color: Colors.green),
))
```
The output is-

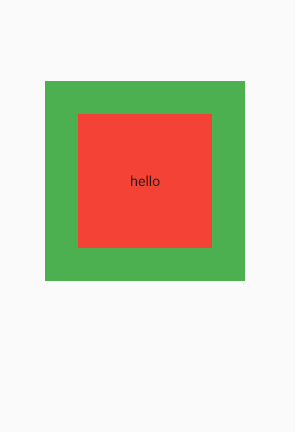 As you can see we have a border of same width for all side.
## How to define defferent border for each side
```
Container(
child: Center(child:Text("Hello")),
height: 200,
width: 200,
decoration: BoxDecoration(
color: Colors.redAccent,
border: Border(
top: BorderSide(width: 5, color: Colors.green),
left: BorderSide(width: 10, color: Colors.yellow),
right: BorderSide(width: 15, color: Colors.blue),
bottom: BorderSide(width: 25, color: Colors.grey),
)))
```
The Output is-

As you can see we have a border of same width for all side.
## How to define defferent border for each side
```
Container(
child: Center(child:Text("Hello")),
height: 200,
width: 200,
decoration: BoxDecoration(
color: Colors.redAccent,
border: Border(
top: BorderSide(width: 5, color: Colors.green),
left: BorderSide(width: 10, color: Colors.yellow),
right: BorderSide(width: 15, color: Colors.blue),
bottom: BorderSide(width: 25, color: Colors.grey),
)))
```
The Output is-

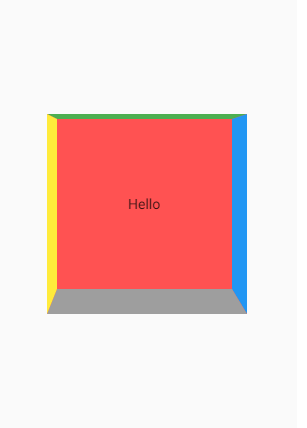 Now here all four side of container have different color and width of border.
NOTE : You can also define border for any combination of side.
# How to define Border Radius
Border radius is used to curve the edges (style) of border.
## Rounded rectangle containers with border
```
Container(
child:Center(child: Text("hello")),
height: 200,
width: 200,
decoration: BoxDecoration(
color: Colors.red,
border: Border.all(width: 5,color: Colors.yellow),
borderRadius: BorderRadius.circular(30)
))
```
The Output is-

Now here all four side of container have different color and width of border.
NOTE : You can also define border for any combination of side.
# How to define Border Radius
Border radius is used to curve the edges (style) of border.
## Rounded rectangle containers with border
```
Container(
child:Center(child: Text("hello")),
height: 200,
width: 200,
decoration: BoxDecoration(
color: Colors.red,
border: Border.all(width: 5,color: Colors.yellow),
borderRadius: BorderRadius.circular(30)
))
```
The Output is-

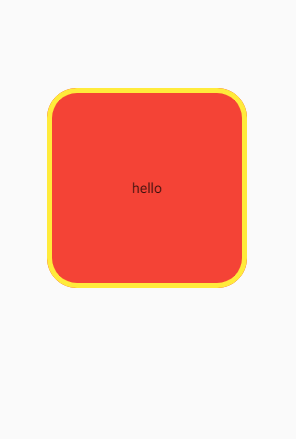 You can see the rounded yellow border in the image.
What if we Increases the value of radius.
## Circular Container
```
Container(
child:Center(child: Text("hello")),
height: 200,
width: 200,
decoration: BoxDecoration(
color: Colors.red,
border: Border.all(width: 5,color: Colors.yellow),
borderRadius: BorderRadius.circular(200)
))
```
The Output is-

You can see the rounded yellow border in the image.
What if we Increases the value of radius.
## Circular Container
```
Container(
child:Center(child: Text("hello")),
height: 200,
width: 200,
decoration: BoxDecoration(
color: Colors.red,
border: Border.all(width: 5,color: Colors.yellow),
borderRadius: BorderRadius.circular(200)
))
```
The Output is-

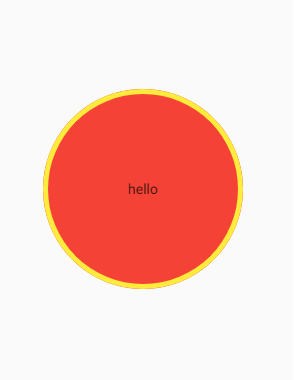 Now you can see that we have a circular container .That looks nice.
## Conatiner with Horizontal radius(Left and Right)
```
Container(
height: 200.0,
width: 200.0,
alignment: Alignment.center,
decoration: BoxDecoration(
borderRadius: BorderRadius.horizontal(
left: Radius.circular(20.0),
right: Radius.circular(80.0)
),
color: Colors.green,
),
child: Text('Hello'),
)
```
The Output is-

Now you can see that we have a circular container .That looks nice.
## Conatiner with Horizontal radius(Left and Right)
```
Container(
height: 200.0,
width: 200.0,
alignment: Alignment.center,
decoration: BoxDecoration(
borderRadius: BorderRadius.horizontal(
left: Radius.circular(20.0),
right: Radius.circular(80.0)
),
color: Colors.green,
),
child: Text('Hello'),
)
```
The Output is-

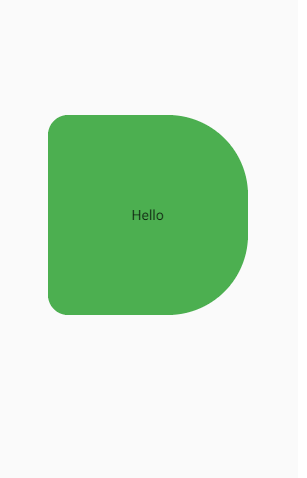 Now observe that the Left side edge are curved same and right side edge curve is same.
## Conatiner with Vertical radius(Top and Bottom)
```
Container(
height: 200.0,
width: 200.0,
alignment: Alignment.center,
decoration: BoxDecoration(
borderRadius: BorderRadius.vertical(
top: Radius.circular(20.0),
bottom: Radius.circular(80.0)
),
color: Colors.green,
),
child: Text('Hello'),
)
```
The output is-

Now observe that the Left side edge are curved same and right side edge curve is same.
## Conatiner with Vertical radius(Top and Bottom)
```
Container(
height: 200.0,
width: 200.0,
alignment: Alignment.center,
decoration: BoxDecoration(
borderRadius: BorderRadius.vertical(
top: Radius.circular(20.0),
bottom: Radius.circular(80.0)
),
color: Colors.green,
),
child: Text('Hello'),
)
```
The output is-

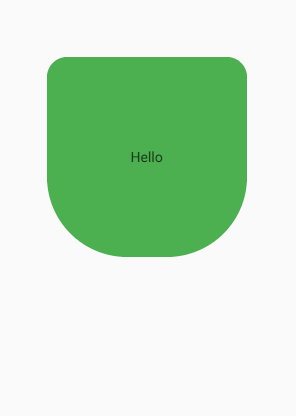 Now the border is same from top and same for bottom.
# Container with Image and Rounded Border
```
Container(
height: 200.0,
width: 200.0,
decoration: BoxDecoration(
borderRadius: BorderRadius.circular(20.0),
color: Colors.white,
image: DecorationImage(fit: BoxFit.cover,
image: NetworkImage(‘[https://picsum.photos/200/300’](https://picsum.photos/200/300')))
),
)
```
The output is-

Now the border is same from top and same for bottom.
# Container with Image and Rounded Border
```
Container(
height: 200.0,
width: 200.0,
decoration: BoxDecoration(
borderRadius: BorderRadius.circular(20.0),
color: Colors.white,
image: DecorationImage(fit: BoxFit.cover,
image: NetworkImage(‘[https://picsum.photos/200/300’](https://picsum.photos/200/300')))
),
)
```
The output is-

 ## Container with List of Box Shadow
```
Container(
height: 100.0,
width: 200.0,
decoration: BoxDecoration(
color: Colors.white,
boxShadow: [
BoxShadow(color: Colors.red, blurRadius: 0.0, spreadRadius:20 ),
BoxShadow(color: Colors.green, blurRadius: 40.0, spreadRadius:30)
]
),
)
```
The Output is-

## Container with List of Box Shadow
```
Container(
height: 100.0,
width: 200.0,
decoration: BoxDecoration(
color: Colors.white,
boxShadow: [
BoxShadow(color: Colors.red, blurRadius: 0.0, spreadRadius:20 ),
BoxShadow(color: Colors.green, blurRadius: 40.0, spreadRadius:30)
]
),
)
```
The Output is-